Why do I blog this? I always wanted to play around with one of these. I did a bit playing around with Arduino but never went for something more than a 20-40 lines of code. Maybe this helps to get me into a deeper sphere of playing around with these quite powerful things.
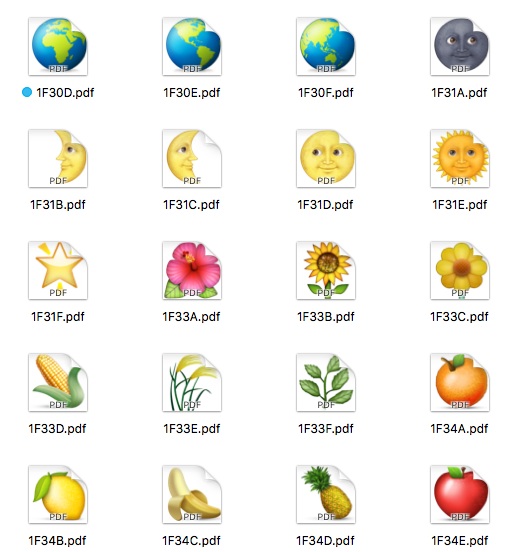
I found a rather quick way to get emoji in my document. But this is the brute force quick way. The russian way. It always works but is not that elegant. PDF-images.
Search the emoji-PDF files you need for your document
Copy them to the folder where your .tex-document resides
Define a shortcut/macro to include those emoji-PDF files you need
Include the following code in your .tex-document
\usepackage{scalerel} % needed package to scale the pdf-images perfectly
\def\emojithumbup{\scalerel*{\includegraphics{emoji_thumbup_1F44D.pdf}}{O}}
\def\emojistar{\scalerel*{\includegraphics{emoji_star_2B50.pdf}}{0}}
In your document
This my five star rating
\emojistar\emojistar\emojistar\emojistar\emojistar
I would say \emojithumbup for this easy integration.
Update 17.09.2019
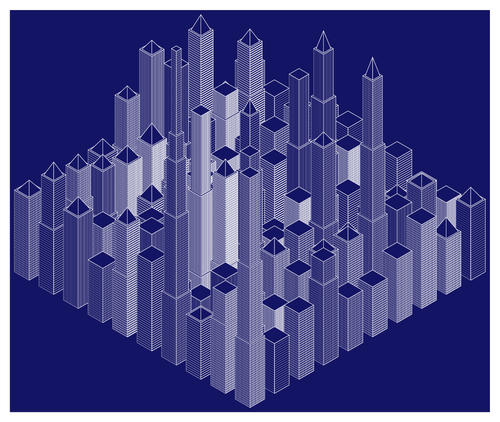
There is a quite interesting LaTeX Website called texample.net where you can see and learn lots of stuff about how to draw something in LaTeX. See following example:
Erreicht wurde das Ergebnis mit zwei Zusatzpaketen für TeX:
TikZ and PGF are TeX packages for creating graphics programmatically. TikZ is build on top of PGF and allows you to create sophisticated graphics in a rather intuitive and easy manner.
TikZ
Was ist TikZ? Nach dem Lesen der ersten Seiten des Manuals bin ich der Ansicht zumindest „T“ steht für Till Tantau den Entwickler. Und bei Wikipedia steht, es stehe für „TikZ ist kein Zeichneprogramm“. Das das eine Rekursion mit Henne-Ei-Problem ist scheint dem Entwickler egal.
With TikZ you get all the advantages of the “TEX-approach to typesetting” for your graphics:
quick creation of simple graphics, precise positioning, the use of macros, often superior typography. You also
inherit all the disadvantages: steep learning curve, no wysiwyg, small changes require a long recompilation
time, and the code does not really “show” how things will look like.
[…]
In practice, TikZ is the only “serious” frontend for pg
PGF
Was ist PGF? Jo, ich hab nach dem Überfliegen des Manuals (pgfmanual_3.0.1a) immer noch keine Ahnung wofür die Abkürzung steht. Typisch MathematikerInformatiker mal wieder.
It turns out that there are actually two layers below TikZ. […] most users will only use TikZ and almost no one will use the system layer directly […]
Why do I blog this? Because when I tried to integrate the coloremoji.sty class in my LaTeX document, I got a series of issues with conflicting textinput encodings not matching the one the coloremoji expects. This way your avoid any new encoding issues by directly integrating PDF-images which is what will happen anyway with that class. maybe you need to include \usepackage[pdftex]{graphicx} too.
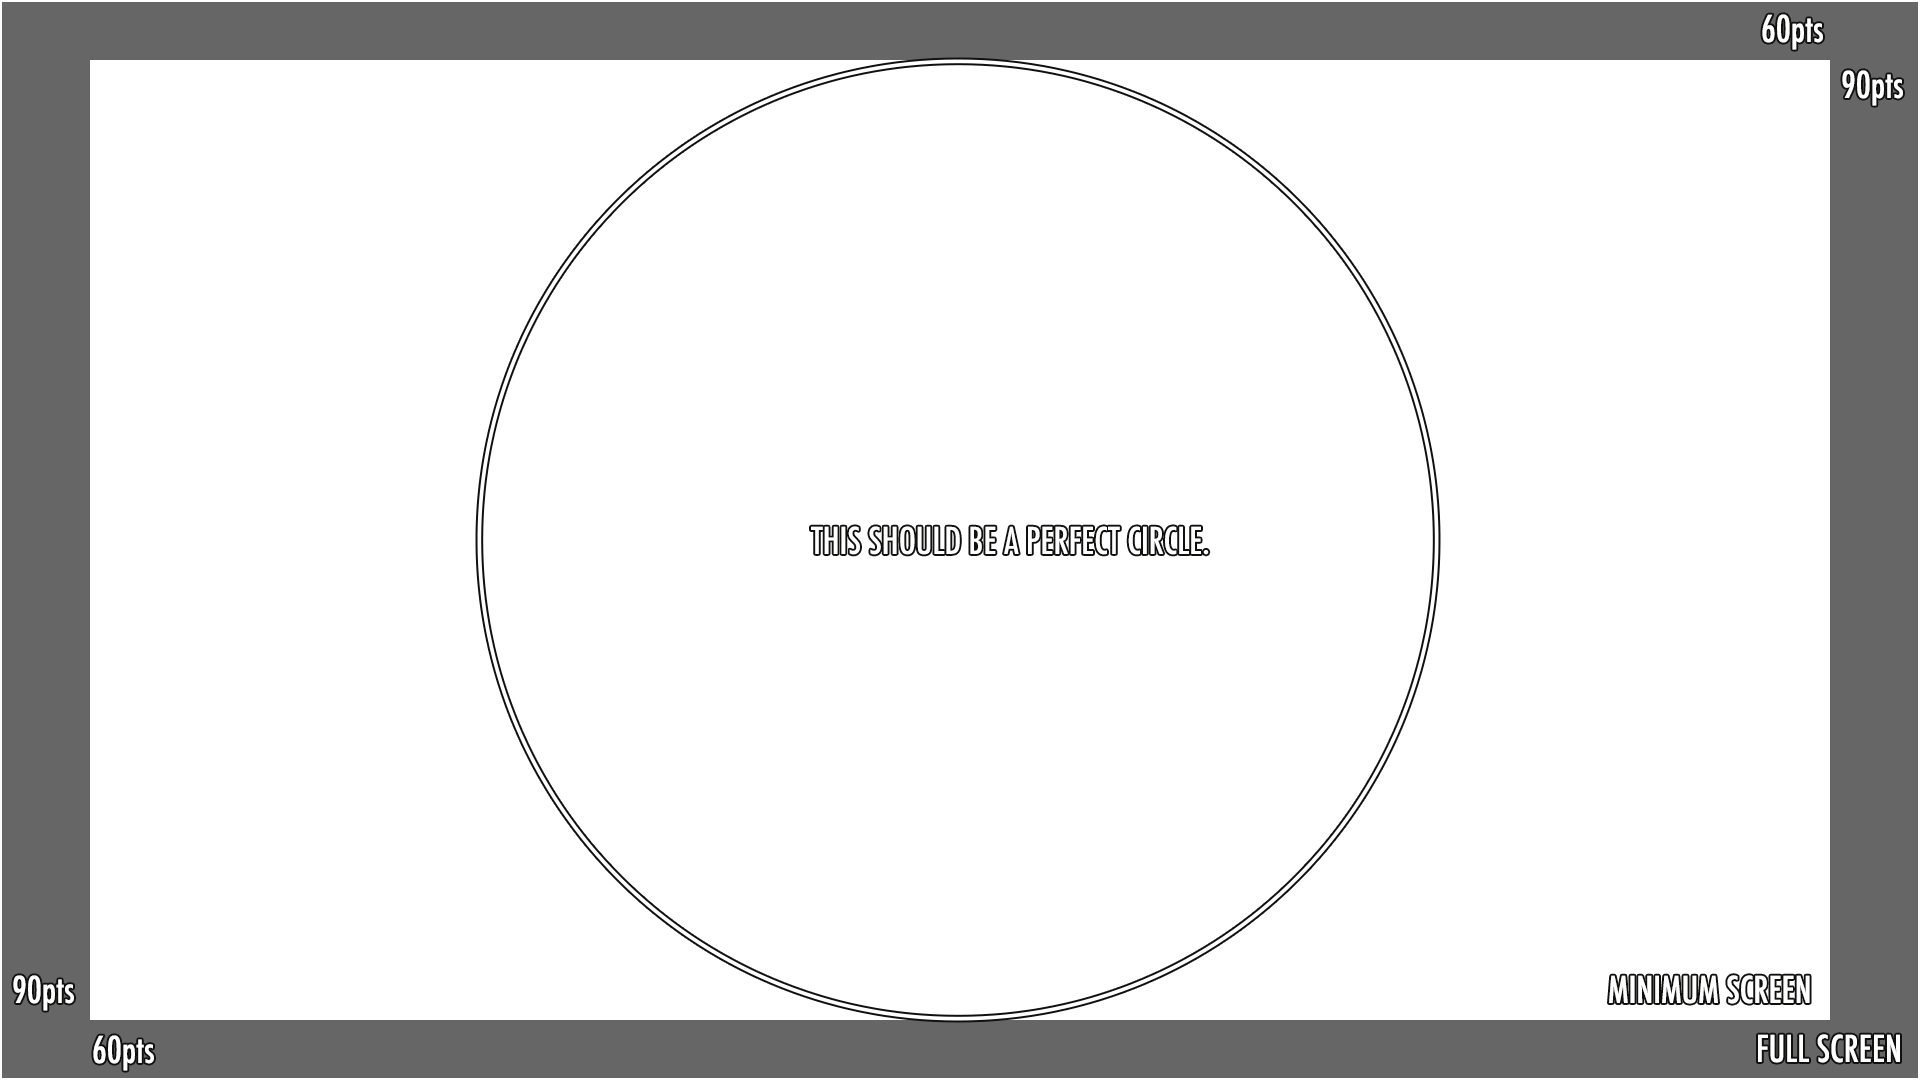
I am developing an app for tvOS. One thing you quickly run into when testing on real world devices is the limits of screensize on several TV models. For this apple added a calibration tool in the settings.
I found I needed this info to actually make my UI layout work for customers. So I took a screenshot and created this screenimage as (PNG) to overlay it at any time in the dev-process for orientation of myself as a Remote Layout Helper).
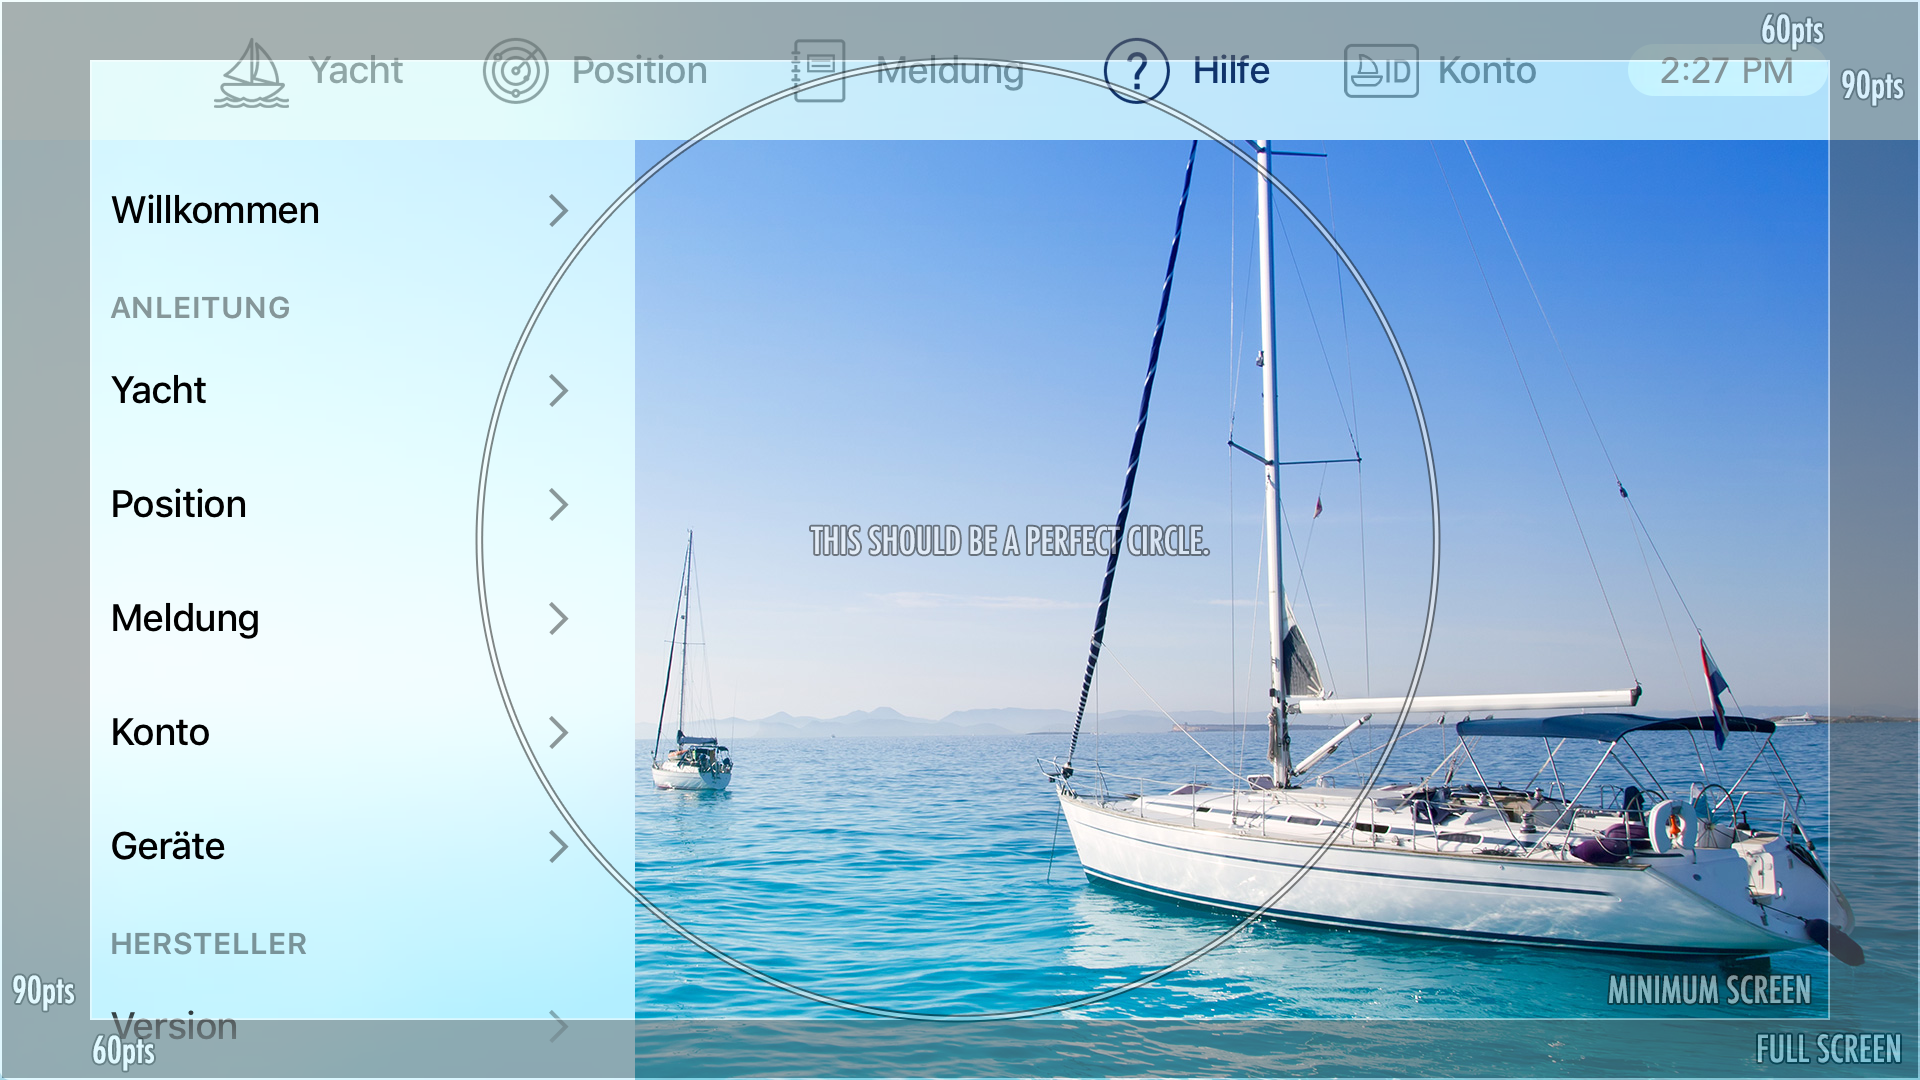
This adds an overlay of the Remote Layout Helper screen image on TOP of everything else and a gesture recognizer monitoring the PLAY/PAUSE-button of the TV remote. It calls following method:
This helped me a lot doing the right things during development. I hope it helps you too. Feel free to share!
How to use it
You simply press PLAY/PAUSE again and again and the overlay will fade in at different alpha-blending-levels between 0.0 and 1.0. This allows to easily check boundaries of UI elements displayed against the screenlimits.
See following screen example: The overlay in action on an app displayed.
Recognize, that you need a retained variable for the UIImageView called overlayImageView and another for the tap gesture recognizer called overlayPlayPauseGesture to be overlaid. And recognize that I use a boolean Precompiler-Flag named DEBUG_CALIBRATION_OVERLAY to switch this feature OFF in deployment.
Why do I blog this? I found it cumbersome to check against real world TV screens if my app works. So I just made sure that most of my UI is usable from within the MINIMUM SCREENSIZE frame the overlay gfx displays to me. Checking this anytime using the remote is a huge plus also on the real device. (Do not forget to disable the code on deployment!)

 I found a rather quick way to get emoji in my document. But this is the brute force quick way. The russian way. It always works but is not that elegant. PDF-images.